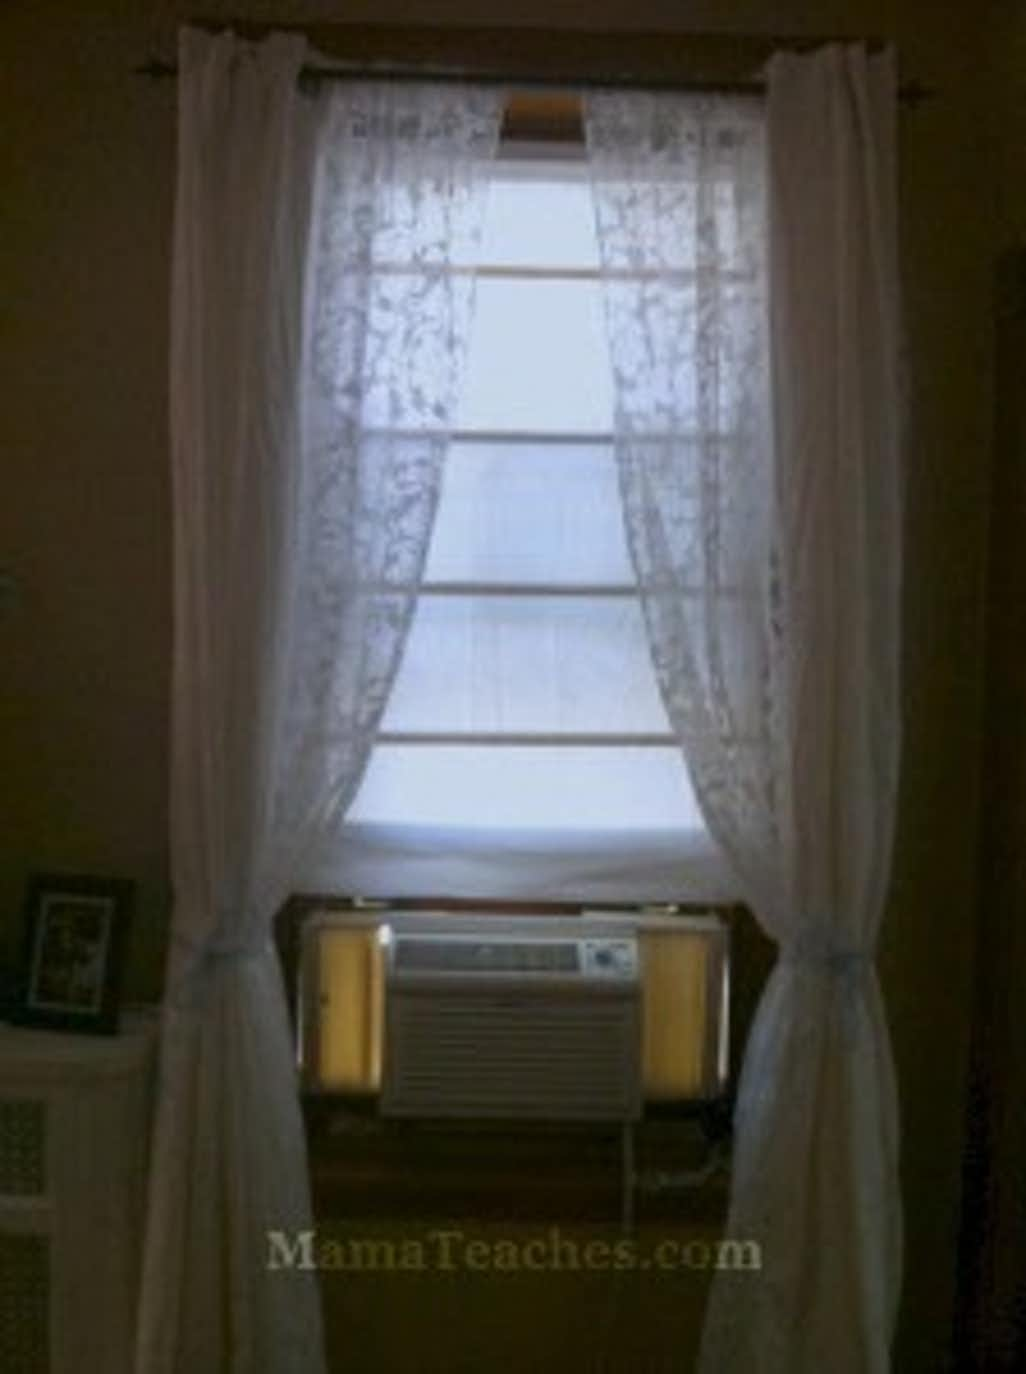

When we moved into our house seven years ago, I had big plans to replace all of the mini-blinds with beautiful Roman shades and curtains. And then the washer and dryer both broke within a month of moving in, so that plan was put on hold. For seven years.
I finally worked up the energy and enthusiasm for creating some great DIY shades after seeing this tutorial by The Inspired Room on Pinterest. It was perfect, it was easy, and it was theoretically doable. Unfortunately, fabric, for the width I needed, was cost prohibitive. As it turns out, a new or recycled flat twin sheet works just as well for a teeny tiny fraction of the cost! Here’s how I did it and how you can transform your old mini blinds (and sheets!) into beautiful shades too.
Recycled Mini Blinds to Roman Shades
You will need:
- Scissors
- A tape measure or ruler
- Mini blinds
- A twin size flat sheet in the color of your choice
- Tacky fabric glue
Directions:
1.Start by taking down your old mini blinds and washing them off outside or in the bathtub with some warm, soapy water. Let them dry completely, especially the cords, before beginning the next step.
2.After the blinds are dry, release the cords and extend the blinds as you lay them out on the floor.
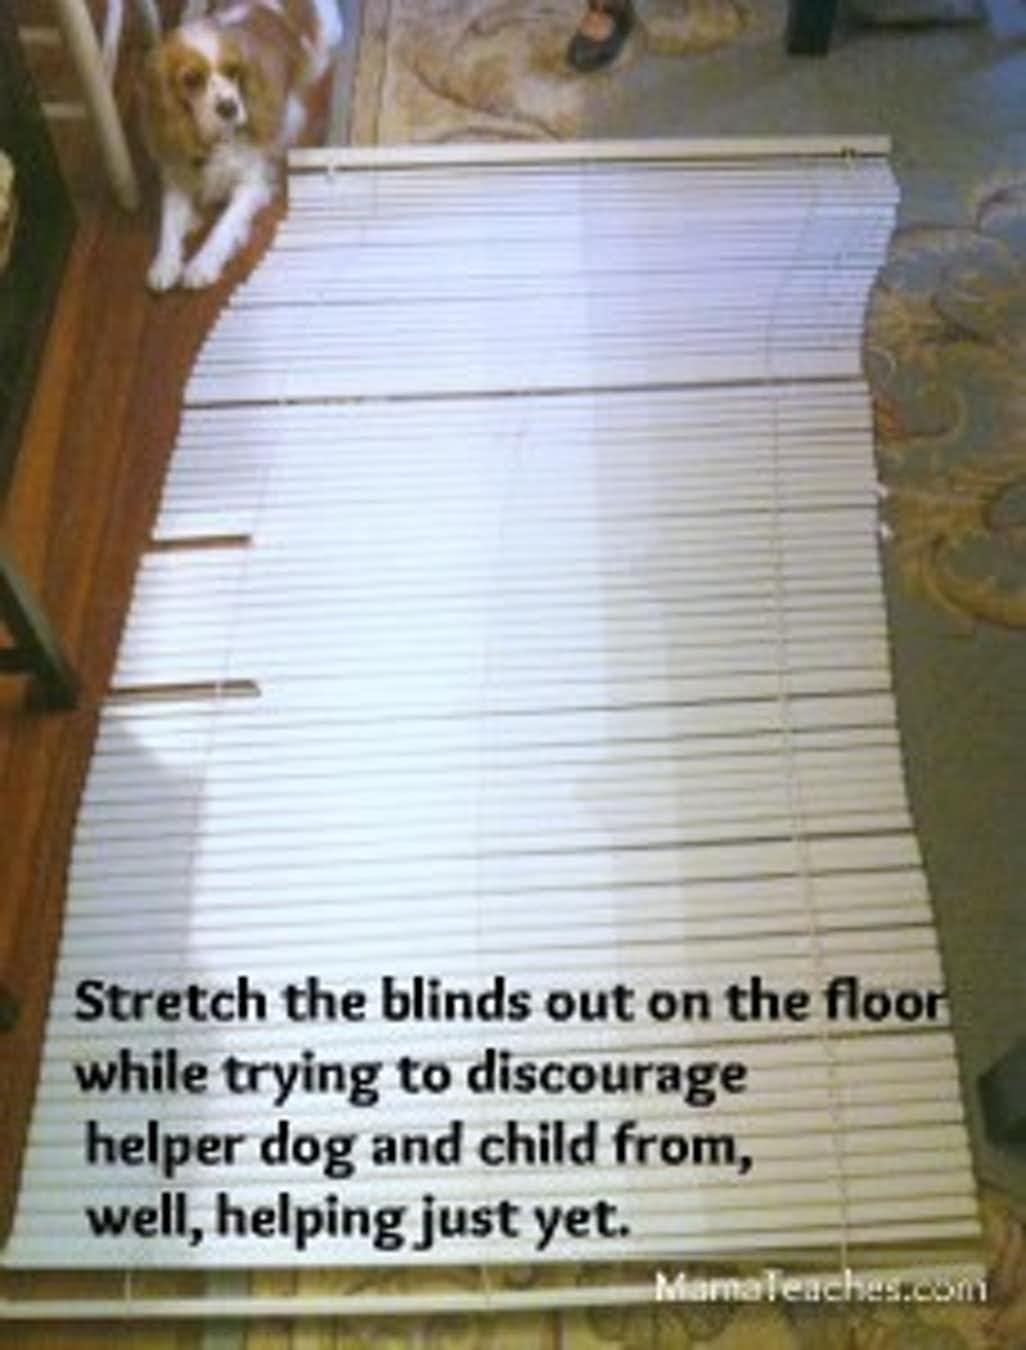
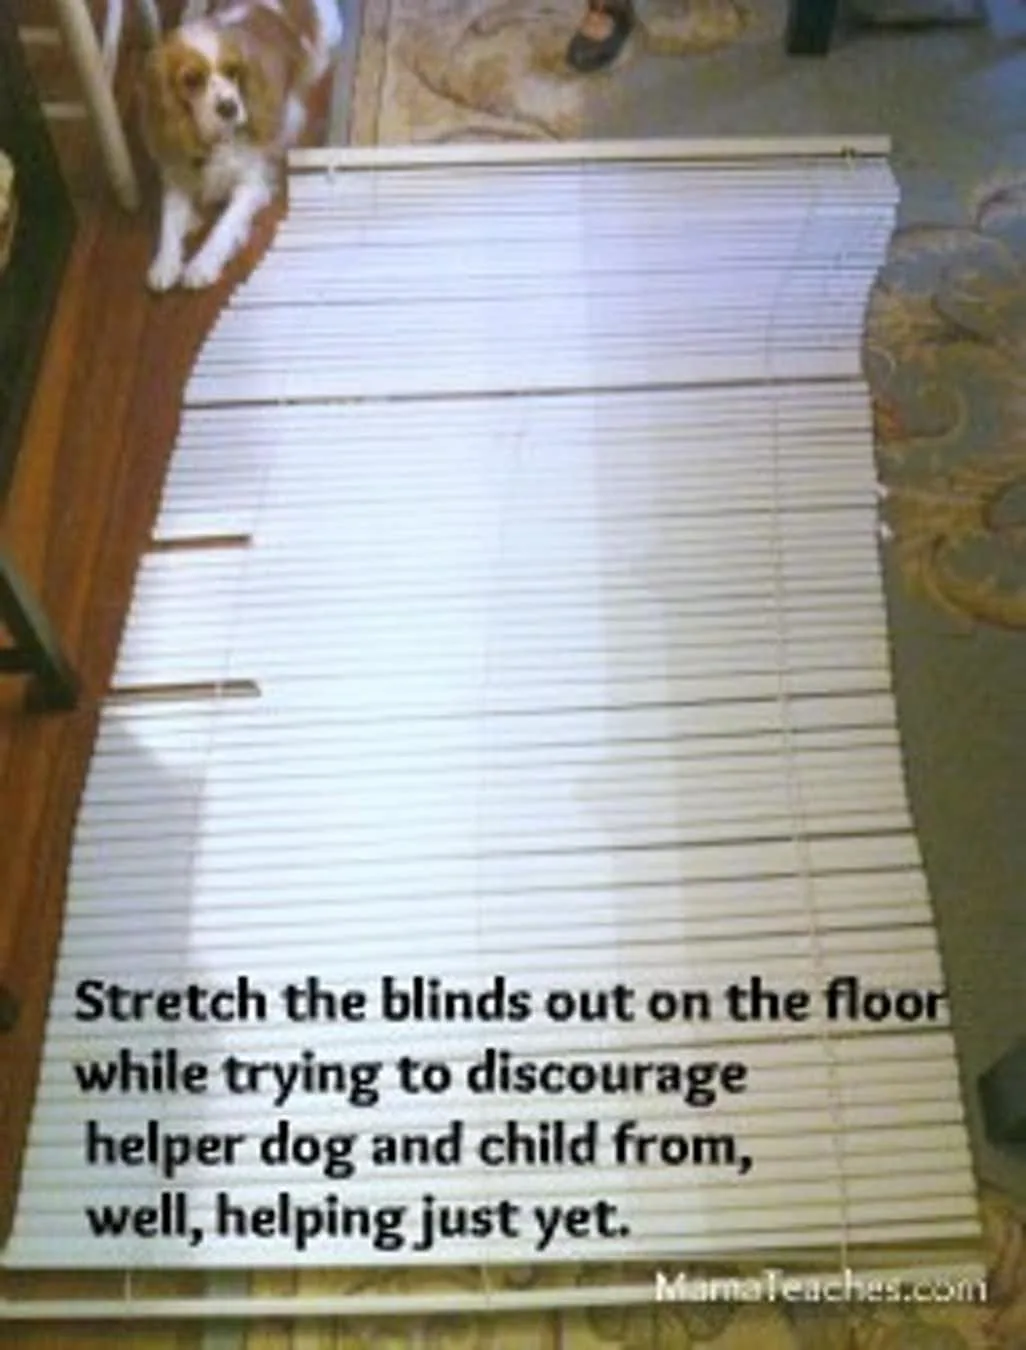
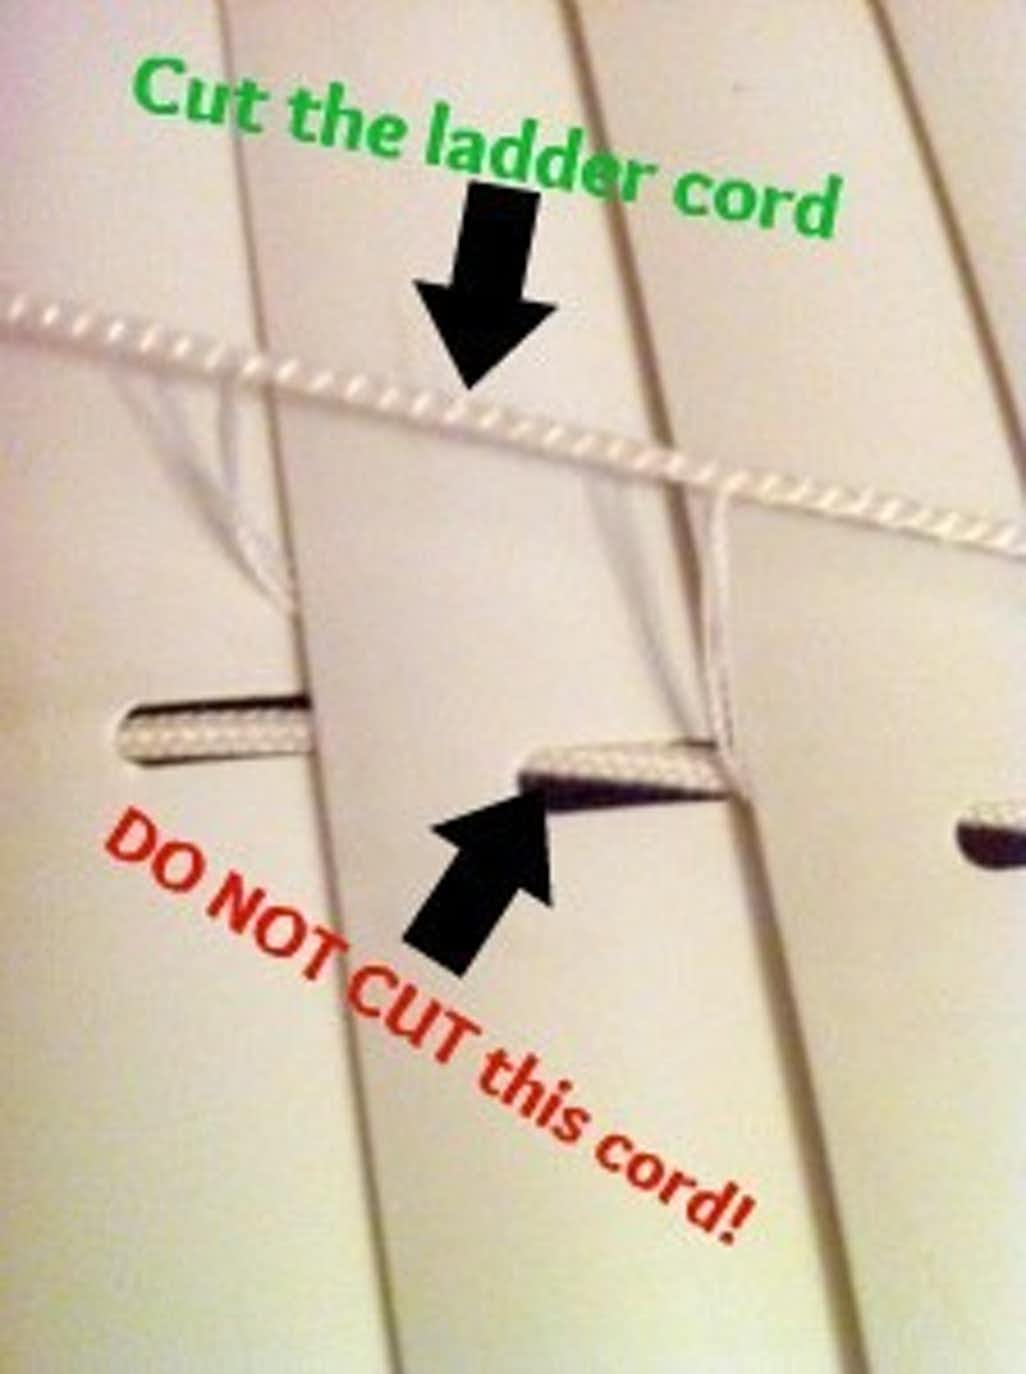
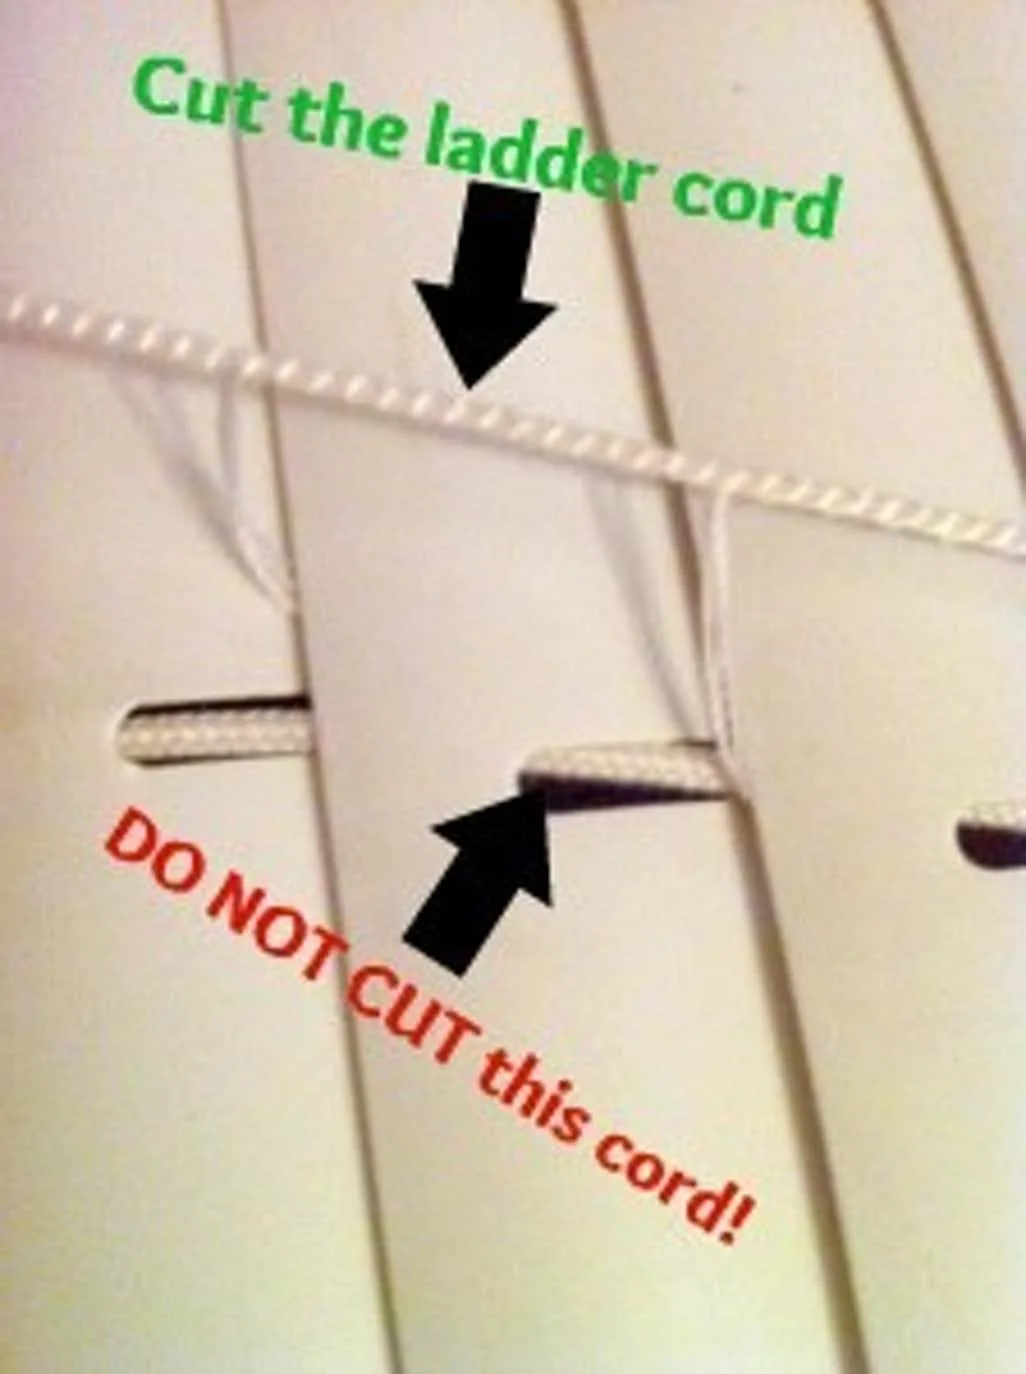
3. Carefully, cut the ladder cords on either side and the middle and remove them. It’s very important that you not cut the middle pull cord! If you cut the pull cord, you’ll need to get another set of mini blinds. (How I Did It: I had a pint-size helper who wanted desperately to be a part of the project, so I set her to work cutting the ladder cord in the middle while I cut the ones on either side.)
4. Measure the window and the shade and decide how many pleats you’d like in the shade. For the shades in my daughter’s room I went with every 12 inches, but for the dining room windows it was every 9 inches. I then divided the total length of the window by the distance between each pleat and, miraculously, they all worked out evenly. (How I Did It: Our home is almost 100 years old and lacks central air, so in the summertime we put window air conditioners in. It was important to me that the shade rest just above the air conditioning unit, so I planned out the pleats accordingly.)
5. Using the number of pleats that you came up with by dividing the total length by the space between each pleat, count out twice that number of blinds and push them to the top. For example, if you’re planning on seven pleats, reserve 14 blinds.
6. Pop off the caps on the bottom of the blinds and carefully pull out the string for the center cord. When you open it up you’ll see a mess of cords, so remove the rest of the ladder cord before pulling out the center cord.

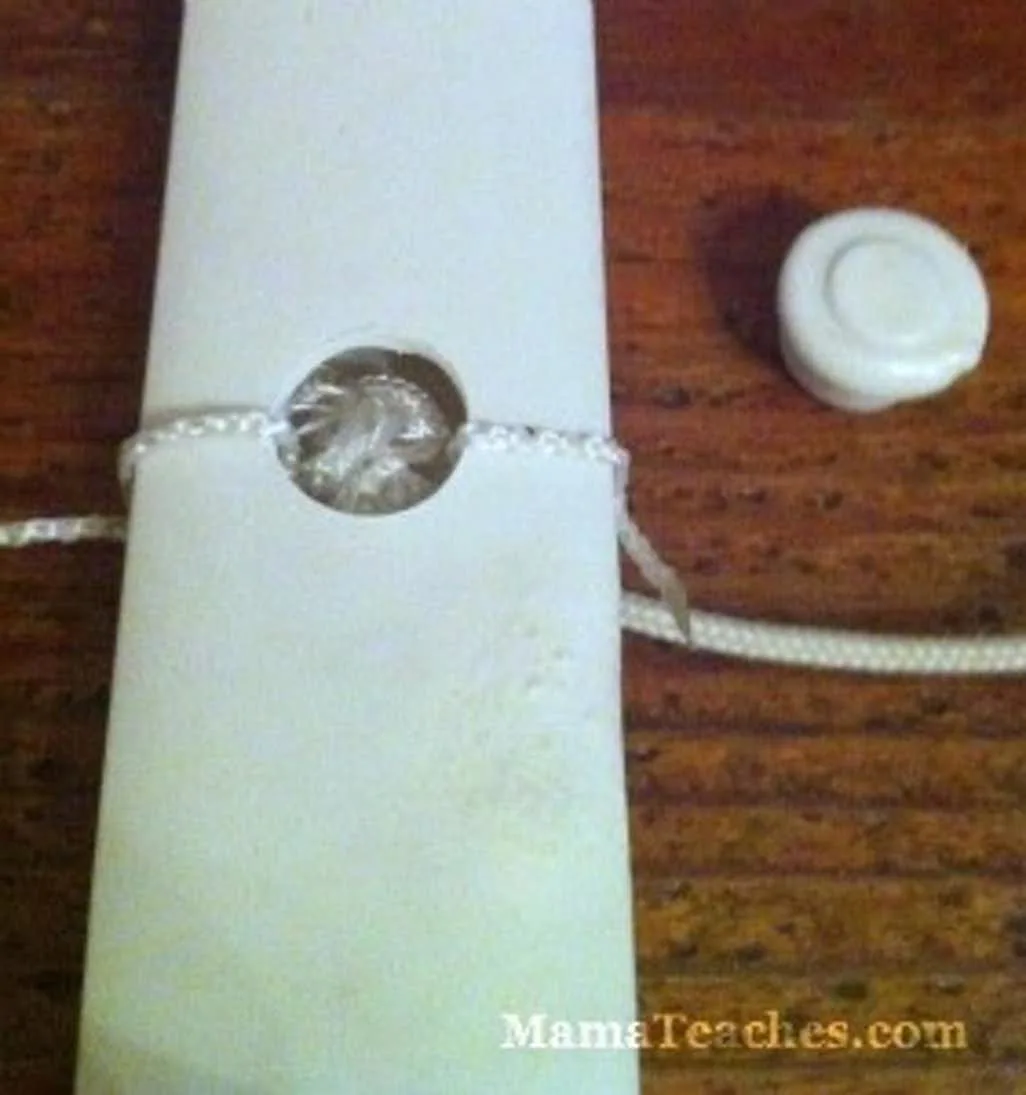
7. Untie the knot and slip the bottom rung, as well as, the blinds that have not been reserved from step 5, off the cord.
8. Thread the string back through the bottom rung, knot it, and recap the holes.
9.Stretch your twin sheet out on a flat, solid space (i.e., the floor or the dining room table if you don’t want to crawl around on the floor). If you want to iron it before you begin, go for it. (How I Did It: To protect the table, I placed towels across the surface before stretching out the sheet. This keeps any glue that might seep through from getting on the table top. Also, I was too impatient and didn’t iron.)
10. Lay the blind out on the sheet (pull cord side up), pulling it taut. Leave about 1/2″-3/4″ of fabric around the sides, an inch of fabric at the bottom, and two inches at the top. Trim the rest of the fabric away.
11. Use the ruler or tape measure to mark off each pleat interval and place two slats on top of one another at each location. By using two slats (which we’ll glue together), the shade becomes stronger and more durable.
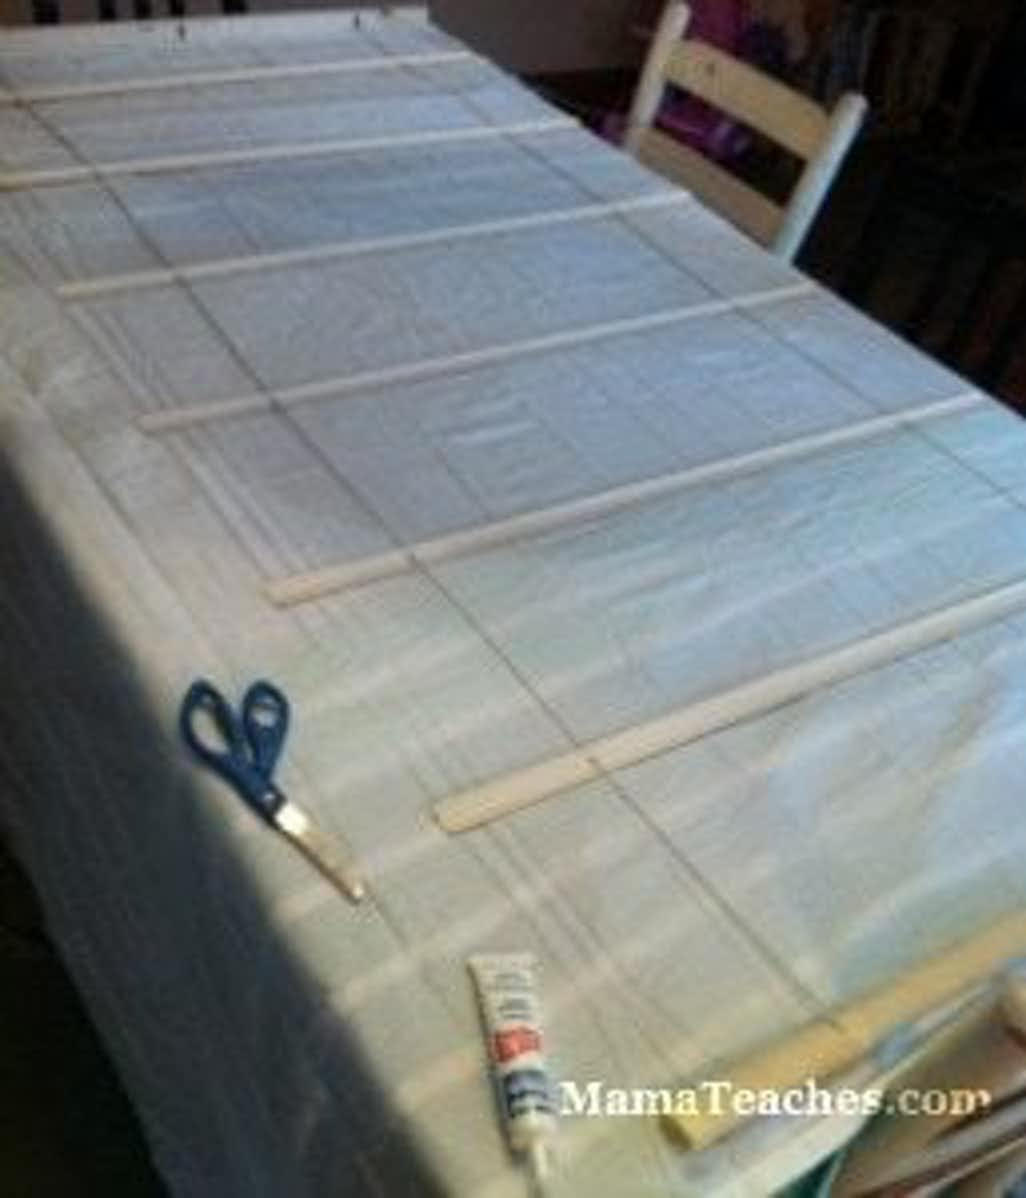

12.After the intervals are measured out and the slats are placed accordingly, use the sticky glue to glue each pair of slats together. It’s imperative that you not glue close to the pull cords! If they stick to the fabric, the shade will not raise or lower.
13. Glue the slats down onto the fabric, pressing firmly as you go.
14. Put a dab or two of glue on the end of each slat and press the edges over to create a finished edge. (How I Did It: I also glued along the edge of the fabric edge and pressed that down while pressing down the fabric on the slats. It created a cleaner edge.)
15. Fold the bottom fabric up and glue it to the base of the blinds. Be sure to tuck in the corners to make it look pretty.
16. Fold down the top of the fabric and glue it to the top bar of the blinds, about an inch in from the end. Don’t glue the fabric right to edge, as you won’t be able to get the blind into the holder when you go to hang it back up. Be sure to finish the fabric though so that it hangs nicely at the top.
17. Let dry at least 12-24 hours.
18. Hang and admire your beautiful work! Good job!