A Homeschool Owl Unit Study with Owl Pellets
This article contains affiliate links to things that you might like.
That’d be these kids!
In fact, they find it is so amazingly fun that Little Miss actually begs me to do science lessons every day.
Whooo are these kids?!?
These past ten days or so we have been working on an owl unit study for our science unit and have been having a blast.
Spouting out random owl facts through the day is now commonplace.
Speaking of which, owls live on every continent except Antarctica.
Super G is also reading his way through the Harry Potter series this year and owls are featured in the books, so it makes for an excellent tie-in.
We started our owl unit study with a discussion about what owls eat and the fascinating fact that they can’t digest it all.
Warning: The next few sentences are not for the squeamish.
Mainly, they can’t digest the fur, teeth, bones, and feathers of the animals that they eat.
Also, sometimes they eat squirrels.
Who knew?
Anyway, since they can’t digest those things, they form them into a tightly packed ball or pellet and spit it out.
And that, my friend, is where we get owl pellets.
If you do an owl unit study for no other reason than to see your child’s face when you explain that fact, it’s worth it.
Trust me.
My kids had looks of part-fascination, part-disgust, and part-we’d-better-have-gloves-for-this-activity-Mom.
It still makes me chuckle just thinking about it.
When I knew we were going to be doing the owl unit study, I ordered owl pellets from Home Science Tools.
(I have no affiliation with them; I just liked their service…and their owl pellets.) In case you’re having a hard time deciding which pellet kit to get, I’d suggest this one that we used.
The pellets, as you’ll see below were filled with great finds.
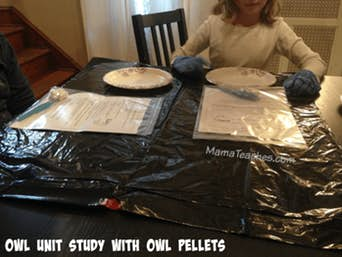
So, to get started, you’ll definitely need gloves for everyone who may come into contact with them.
You’ll also want to put down some newspaper or a disposable table covering (we used trash bags).
Now is not the time to put out the good tablecloth.
You’ll also want to have a paper plate and possibly a bandana to tie around your nose and mouth.
The pellets don’t smell, but they are very dry, so when you breathe or laugh or cough too close to them, you end up stirring up the owl pellet dust.
You’ll also want to tie your hair back if it’s long and if you have science goggles, I always suggest you put them on.
Safety first!
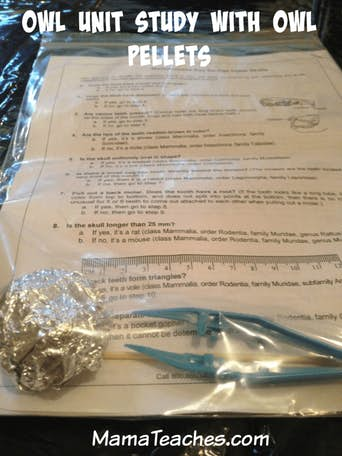
After you have your table covered and ready to go, it’s time to open up your owl pellet kit.
If you ordered the ones that we use, you’ll find that it comes with a great pair of tweezers and a little pick.
Those are your dissection tools and they work great.
Place your foil wrapped pellet on the paper plate and carefully open it.
Now’s a great time to make observations and predictions about what might be found within the grey mass.
We found it difficult to write and dissect at the same time, so we filled out the forms that came with the pellets afterwards.
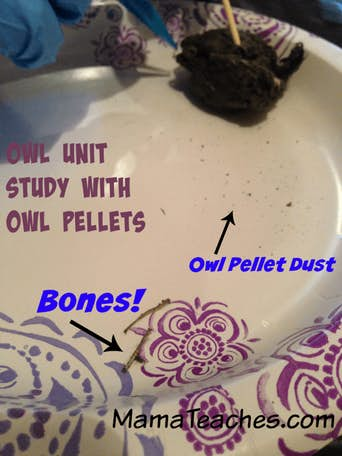
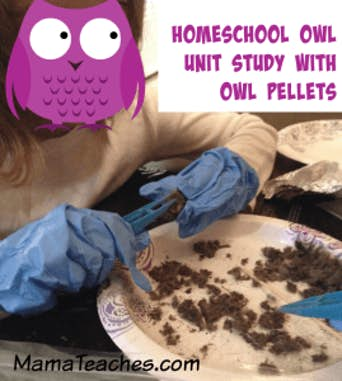
When all of the predictions and observations have been made, it’s time to start dissecting.
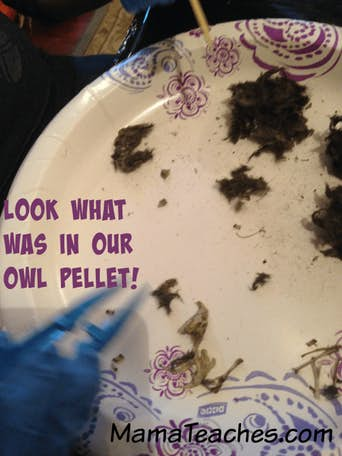
Using your dissection tools, carefully chip away at the owl pellet to reveal bones, fur, teeth, and feathers.
Ours had a ton of bones and fur which suggested to us that the animal that the owl ate was a mouse.
I suggested, jokingly, that we could try putting the bones back together, but the kids wanted no part of that madness.
Yes, dissecting owl pellets was a little messy and slightly gross, but it was also exceptionally fascinating.
It was also a great way to sustain their interest in the owl unit, because they felt personally invested….after all, they had dissected owl “vomit” and it doesn’t get much more personal than that, explained Super G.
Ironically, it wasn’t the 7th or 5th grader who stayed with the dissection the longest either, it was Little Miss, the 1st grader who had to be torn away from dissection so we could get ready for dinner.
So, if you’re thinking about doing an owl unit with owl pellets, but worry that your 6 or 7 year old is too young to dissect, I’d suggest giving it a try.
Every child is different, of course, but Little Miss loved it and still carries around her bag of bones to prove it.
In addition to the owl pellet dissection, we also used this activity and lapbook book from homeschool bits.
It was very easy to adapt for the different grade levels and made it much less stressful when doing the unit study together.
We also watched these videos about owls and owl behavior (please preview these first as some show owls capturing their food!):
- Snowy Owls on National Geographic (This video also led us on a tangent about lemmings.)
- Fishing Owls on Animal Planet
- Great Horned Owl on National Geographic (You’ll find yourself doing the owl head bobs to this one.)
- This is Owl – a reading of the book by Kayleigh O’Mara.
These websites were also intriguing and led us around the web to other great finds:
- BBC Barn Owls – There’s also some great videos of barn owls on this page.
- All About Owls on Enchanted Learning – This is a pay per use site that I’ve used before and liked, but this page is free.
- San Diego Zoo – Great Horned Owl
- Elf Owls from the Arizona-Sonora Desert Museum
Overall, our homeschool owl unit study with owl pellets has been a smashing success!
We have all learned a lot and discovered how grossly exciting science can sometimes be.
Dissect on, fellow homeschoolers!