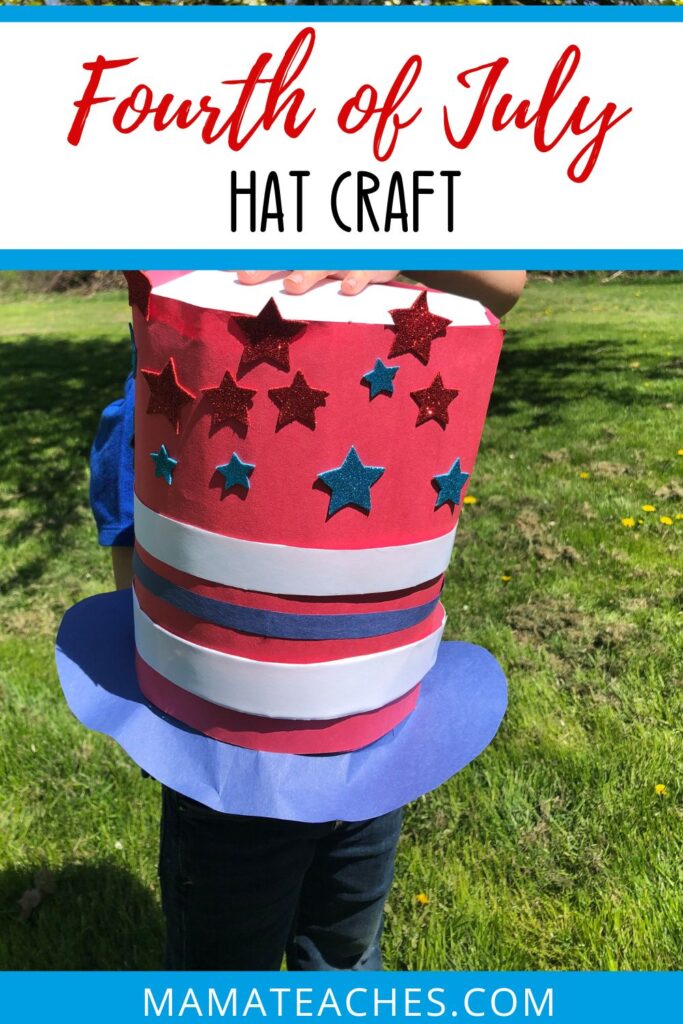
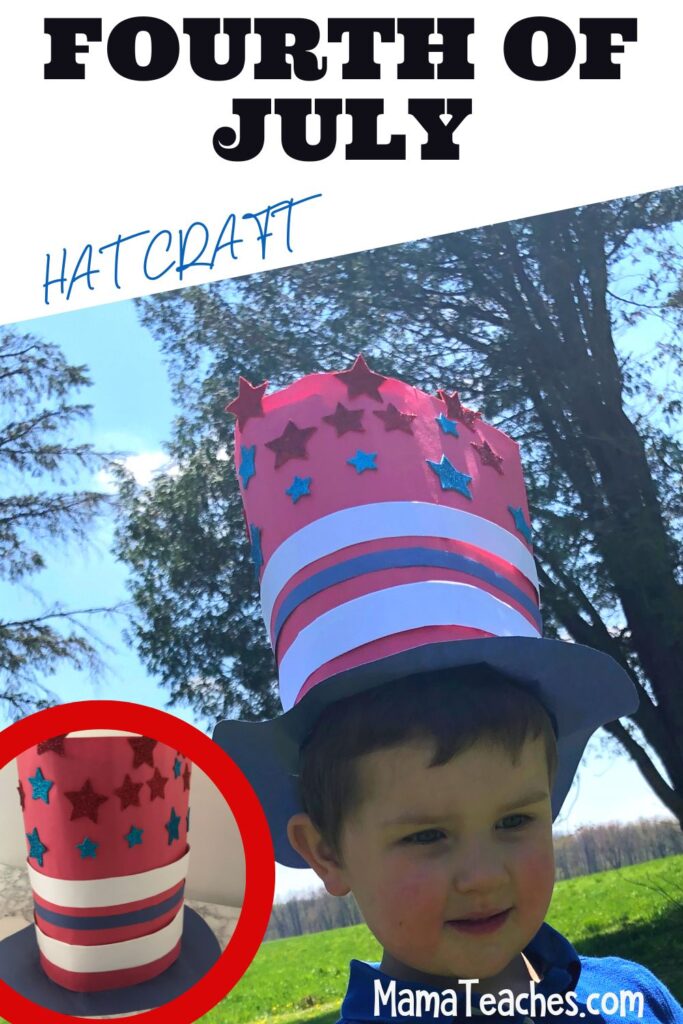
Fourth of July Hat Craft
Create this fun 4th of July craft with your kids to celebrate Independence Day. It is perfect to wear to a party or for dramatic play.

Fourth of July
Kids are home from school (or still home if you homeschool) and may be getting bored with all of their free time.
This 4th of July craft is a great activity to pull out of your hat 😉 to keep them entertained.
The fourth of July is usually synonymous with a party or barbecue.
So help your littles to get party-ready (or have this as an activity at the party) to get the kids excited to celebrate America’s independence.
This 4th of July craft is great because it has few materials, and each kid can add their personal flare to their own 4th of July hat.
This article contains affiliate links to things that you might like.
Items Needed for 4th of July Craft
-construction paper (red, white, and blue)
-gluestick
-tape
-scissors
-circular object (like a big bowl)
-other embellishments (like stars), optional

How to Make a 4th of July Hat
1. Tape two pieces of paper together, connecting the short ends of the paper. This will create a long strip of paper.
2. Wrap the paper around the kid’s head to see how big to make the hat. Then, tape the end of the paper to the hat to create a cylinder.
3. Place this cylinder on another sheet of paper.
4. Trace around the inside of the cylinder.
5. To create the brim of the 4th of July hat, grab a big bowl and trace around it. Be sure that the circle that was just drawn is inside the bowl line.
6. Cut out the larger circle.

7. Using the inner circle as a guide, cut out the inner circle. Do NOT cut on the inner circle line. Instead, cut it a bit smaller than the circle.
8. Cut eight slits from the small circle to the circle drawn on the brim. These slits will make attaching the brim to the 4th of July hat easier.
9. Fold the pieces of paper (teeth) that are between the slits up so they are 90 degrees from the hat’s brim.
10. Place the cylinder on top of the brim so the teeth are inside the cylinder.
11. Tape the teeth to the inside of the cylinder.

Making the Top of the 4th of July Hat
1. To create the lid for the cylinder, trace the inside of the cylinder.
2. Cut out a circle a bit bigger than the traced circle.
3. Using scissors, cut slits to create teeth that go to the drawn line.
4. Fold the teeth so they are pointing towards the center of the circle.
5. Put the circle inside the cylinder. Tape the teeth on the inside of the cylinder.
Decorating the 4th of July Craft
1. Use red, white, and blue paper to cut strips, stars, or the letters U.S.A. to decorate this 4th of July craft.
2. Glue on the 4th of July hat to decorate it.
3. Proudly wear the 4th of July craft!
4th of July Hat
This 4th of July craft is easy to make and can be customized to fit each kid’s vision of the perfect 4th of July hat. From parties to dramatic play, this 4th of July hat will make a statement.