This article contains affiliate links to things that you might like.
There is nothing better than a kids’ craft that is quick, easy, and inexpensive.
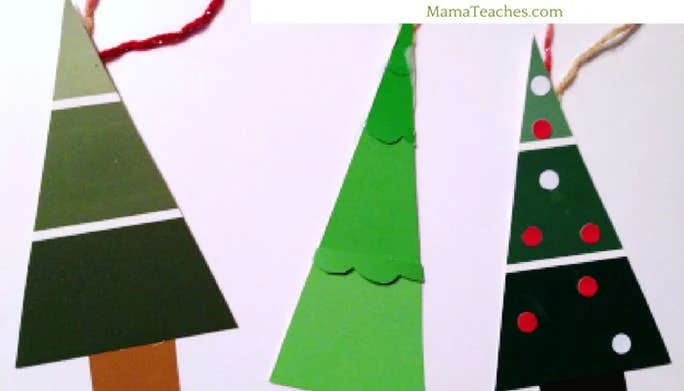
The Paint Chip Christmas Trees are made from the free paint chips found at any store that sells paint.
The larger and wider the paint chip is, the bigger your ornament will be.
Experiment with different sizes, colors, and decorations.
Most of all, have fun!

Paint Chip Christmas Trees
Ages: 3+ (with adult supervision)
Time: 15 minutes
Materials Needed:
- Paint chips in brown and green
- Scissors
- Yarn or ribbon
- Glue (Aleene’s Tacky Glue works best)
- Tape
- Hole punch (optional)
Directions:
- Pick a paint chip that covers three different shades of green for the tree and one brown paint chip for the trunk.
- Trim off the parts of the green paint chip that have the name of the paint colors.
- Cut a large, narrow triangle from the trimmed green paint chip.
- Cut a rectangle from the brown paint chip that is proportional to the triangle tree.
- Glue or tape the trunk to the triangle. Hint: Some paint chips have glossy backs which makes it difficult to get the glue to stick. It may be easier to use tape.
- Fold the length of yarn, approximately 5-inches, in half and tape the ends onto the back of the top of the triangle.
- Optional:
- To add ornaments, use a hole punch to cut the perfect size ornaments. Glue them on as desired.
- For an embellished finish between tree layers, cut a length of the discarded green paint chip into a curved edge. Glue or fold the ends over along the white lines and tape it on.
Alternate Use: The Paint Chip Christmas Trees can also be used as gift tags.
Simply trace the triangle onto a piece of green or red construction paper and glue it onto the back of the paint chip.
You can then write the gift recipient’s name.
Did you make a Paint Chip Christmas Tree Ornament?
Share your beautiful work with us by posting a picture in the comments below or by tagging us on Instagram @MamaTeaches!
